How to add Google Web Stories in Next JS

Mridul Panda
Dec 14, 2023
·10 Min Read
In the fast-paced digital world, user engagement is key to the success of any website. One effective way to captivate your audience is by incorporating Google Web Stories into your Next JS website. These visually appealing and interactive stories can make your content more engaging and shareable. In this comprehensive guide, we’ll walk you through the process of adding Google Web Stories to your Next JS site, step by step.
Getting Started with Google Web Stories
Before diving into the technical aspects, let’s understand what Google Web Stories are and why they matter.
What Are Google Web Stories?
Google Web Stories are bite-sized, visually-rich content pieces that provide a captivating way to deliver information. They are designed to be mobile-first and offer a full-screen, immersive experience to users.
Why Use Google Web Stories?
- Enhanced User Engagement: Stories are visually appealing and keep users engaged.
- Improved SEO: Google often displays Web Stories in search results, increasing visibility.
- Mobile Optimization: Stories are designed for mobile, ensuring a seamless user experience.
Also Read: How to Generate Sitemap in Next JS?
Setting Up Your Next JS Environment
Now that you understand the importance of Web Stories, let’s begin by setting up your Next JS environment. Use the following command to create a new Next JS project:
npx create-next-app my-web-storiesGetting Started with the Web Stories
Google created an interface for you to create your own Stories. It is an AMP-based page that functions exactly like any other story you could encounter on any of these networks. By using it, you may distribute content in a more dynamic way and connect with the young, tech-savvy generation.
By simply installing Google’s Web Stories plugin, you can easily add this functionality to your WordPress-powered website. Utilising it couldn’t be simpler: just select the editor, write your stories, and publish them! The stories are there, it is as simple as that.
Also Read: How to Add Google Analytics in NextJS
Fetching Web Stories from WordPress CMS
You must use an API to view your stories outside of the WordPress environment, right? There are essentially two approaches: One is a REST API and another is GraphQL. We will explore GraphQL One.
Luckily, in WordPress, there is a plugin to create GraphQL APIs. WPGraphQL is a WordPress plugin that will create the GraphQL APIs and serve WordPress as a headless CMS. So go ahead and install the plugin in the WordPress Plugins.
Even if you have both the GraphQL and Web Stories plugins set up, you won’t be able to query the tales because they are not registered. The ‘web-story’ post type should therefore be registered first. This straightforward method enables you to achieve it. Go to the Theme File Editor section under Tools in the sidebar. Now navigate to functions.php file in the editor and scroll to the end and paste the code –
add_filter('register_post_type_args', function ($args, $post_type) {
   if ('web-story' === $post_type) {
    $args['show_in_graphql'] = true;
    $args['graphql_single_name'] = 'webStory';
    $args['graphql_plural_name'] = 'webStories';
  }
  return $args;
}, 10, 2);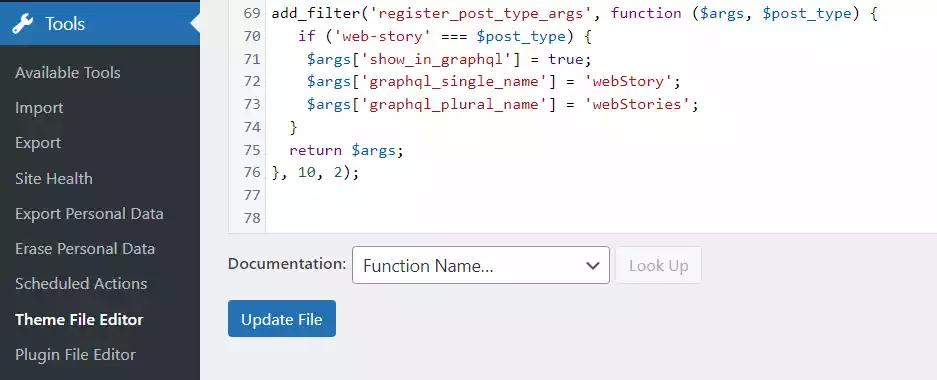
You’re all set! Now that your stories have been added to the type registry, you can query them just like any other post type. You may experiment with it by visiting the GraphiQL IDE that is included with the plugin and attempting to fetch your stories.
Also Read: How to Build PWA with Next JS?
Fetching the Web Stories in Next JS
Now Create at least one web story in the web stories dashboard. After that, we need a basic query to fetch the web stories. Here is a query to fetch the first 1000 web stories from your WordPress CMS.
query GETALLWEBSTORIES {
  webStories(first: 1000) {
    nodes {
      title
      slug
      date
      featuredImage {
        node {
          mediaItemUrl
        }
      }
    }
  }
}
You will receive the titles, slugs, and thumbnails of the stories with this query. Your Next.js front end already allows you to list your tales however you like. The listing is largely up to you and is similar to any data fetching you may perform.
Also Read: Next JS Project Ideas to Boost Your Portfolio
Create Single Web Story in Next JS
I originally tried to achieve that by statically generating the stories. Sadly, there is no way to do it because the plugin provides you with the HTML code for the complete Web Story page. You might attempt to clean up this code with some RegExp, leaving only the code inside the body> and injecting everything from the head> inside the next/head component, and activating AMP on Next, but it would be far too labour-intensive, and there is a high likelihood that you would encounter difficulties validating this claim.
I was only able to come up with one solution: server-side web story generation. To get the specific story, you will need to run another query, something like:
query GETWEBSTORYBYSLUG($id: ID!) {
  webStory(id: $id, idType: SLUG) {
    content
    title
    slug
    featuredImage {
      node {
        mediaItemUrl
        altText
        description
      }
    }
    seo {
      title
      metaDesc
      opengraphModifiedTime
      opengraphPublishedTime
      opengraphImage {
        altText
        sourceUrl
      }
    }
  }
}
Now we have to Create a dynamic page for the web story. So let’s create a dynamic route [slug].tsx under the pages folder.
import WPClient from "../../src/clients/wp-client";
import { QUERY_WEB_STORY_BY_SLUG } from "../../src/graphql/WebStoryQuery";

export const getServerSideProps = async (context: {
  params: { slug: string };
  res: any;
}) => {
  if (context && context.res) {
    const { res, params } = context;
    const slug = params?.slug;

    // fetch your web story here
    const { data } = await WPClient.query({
      query: QUERY_WEB_STORY_BY_SLUG,
      variables: {
        id: slug,
        slug: slug,
      },
    });

    if (!data?.webStory?.content) {
      return {
        notFound: true,
      };
    }

    res.setHeader("content-type", "text/html");
    res.setHeader("Cache-Control", "s-maxage=900, stale-while-revalidate=900");
    res.write(data?.webStory.content);
    res.end();
  }

  return {
    props: {},
  };
};

const StoryPage = () => {};

export default StoryPage;
Rendering of the Web Story Content
In this example, I’m retrieving the story based on its slug. You can certainly accomplish it using its ID, but using the slug will benefit your website’s SEO more.
We have to verify that the story is real after retrieving its data. If it doesn’t, We will return notFound = true, which will cause a 404 page to be displayed (if you have a custom 404 page, this is required; otherwise, Next’s default page will be displayed).
Now, We’ll set the headers now. This section is crucial because you must set a cache-control header because you are rendering it server-side. You should avoid rendering your tale material every time you call this function unless you intend to update it frequently, which is why you need to cache it. With getStaticProps, you can set the time in seconds just like you would with a revalidation.
Once you’ve done that, all you have to do is add content to the response body! Done! You have now added Google Web Stories to your website’s Next.js framework.
Cleanup the Web Stories Content
When you fetch it, the content code will be somewhat “dirty” if you pay attention to it. You can run into issues because of this. If so, you might need to edit this material before adding it to the body of the response. To replace any pointless code, you can write a simple function using RegExp:
const cleanStory = (content) => {
  let cleanContent = "";

  cleanContent = content.replace(/\r?\n|\r/gs, "");
  cleanContent = cleanContent.replace(/<p>/gs, "");
  cleanContent = cleanContent.replace(/<\/p>/gs, "");

  cleanContent = cleanContent.replace(
    /<html.*?>/g,
    `<!DOCTYPE html>\n<html amp="" lang="en">`
  );

  cleanContent = cleanContent.replace(
    /rel="stylesheet"/g,
    'rel="preload" as="style"'
  );

  return cleanContent;
};

res.setHeader("content-type", "text/html");
res.setHeader("Cache-Control", "s-maxage=900, stale-while-revalidate=900");
res.write(cleanStory(data?.webStory.content));
res.end();
Adding SEO Data in the Web Stories
We also want to add the SEO title, SEO Description, Meta image, and Canonical tags that we fetched earlier. We can do that link this –
const SeoData = data.webStory.seo;

cleanContent = cleanContent.replace(
  /<link rel="canonical".*?[>]/g,
  `<link rel="canonical" href="${SITE_URL}/web-stories/${slug}">
  <meta name="description" content="${SeoData?.metaDesc}">
  <meta property="og:locale" content='en_US'>
  <meta property="og:type" content='article'>
  <meta property="og:site_name" content='mridul.tech'>
  <meta property="twitter:card" content='summary_large_image'>
  <meta property="twitter:site" content='@i_mridul'>
  <meta property="og:title" content="${SeoData?.title}">
  <meta property="og:description" content="${SeoData?.metaDesc}">
  <meta property="og:image" content="${SeoData?.opengraphImage?.sourceUrl}">
  <meta property="og:image:height" content="1350">
  <meta property="og:image:width" content="1080">
  <meta property="og:url" content="${SITE_URL}/web-stories/${slug}">`
);
Here we have added all the required SEO data.
Add Google AdSense to the Web Stories
This is the best part of the article. Now we will monetize the web stories. There is a place for AdSense ID in the Google Web Stories Plugin, but that doesn’t work with the GrapgQL API so we have to do that manually. First, set up your AdSense account –
Tip: How to add Google AdSense in Next JS
Next, go to the Ads section and click on by ad Unit. You have to choose Display ads at it only support amp ads
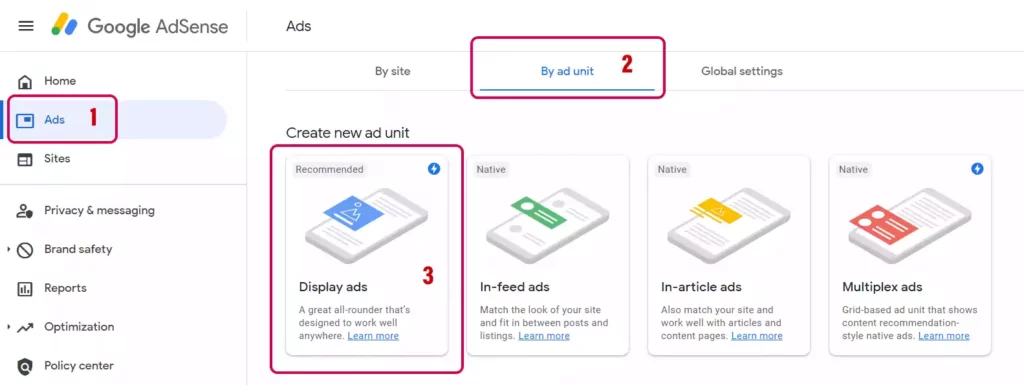
Now give this Ad a name and click on Create. Now you will see the code for the AdSense.

Now you will see a popup where you will find the code for the Ad unit. Here you have to check for two things data-ad-client and data-ad-slot. Copy these two values as we need them. We have to not add some more code in the clean content. Replace data-ad-client and data-ad-slot with your values.
cleanContent = cleanContent.replace(
  /<amp-story-page/,
  `<amp-story-auto-ads>
      <script type="application/json">
        {
          "ad-attributes": {
          "type": "adsense",
          "data-ad-client": "ca-pub-XXXXXXXXX",
          "data-ad-slot": "XXXXXXX"
          }
        }
      </script>
    </amp-story-auto-ads>
    <amp-story-page
  `
);
After that, we need to add the script for the Google Adsense. Add the script with the meta tags. And now the ads will appear in your web stories.
<script async custom-element="amp-story-auto-ads" src="https://cdn.ampproject.org/v0/amp-story-auto-ads-0.1.js"></script>Here is the full code of [slug].js
import WPClient from "../../src/clients/wp-client";
import { SITE_URL } from "../../src/config/constants";
import { QUERY_WEB_STORY_BY_SLUG } from "../../src/graphql/WebStoryQuery";

export const getServerSideProps = async (context: {
  params: { slug: string };
  res: any;
}) => {
  if (context && context.res) {
    const { res, params } = context;
    const slug = params?.slug;

    // fetch your web story here
    const { data } = await WPClient.query({
      query: QUERY_WEB_STORY_BY_SLUG,
      variables: {
        id: slug,
        slug: slug,
      },
    });

    if (!data?.webStory?.content) {
      return {
        notFound: true,
      };
    }

    const cleanStory = (content) => {
      let cleanContent = "";

      cleanContent = content.replace(/\r?\n|\r/gs, "");

      cleanContent = cleanContent.replace(/<p>/gs, "");
      cleanContent = cleanContent.replace(/<\/p>/gs, "");

      cleanContent = cleanContent.replace(
        /<html.*?>/g,
        `<!DOCTYPE html>\n<html amp="" lang="en">`
      );

      cleanContent = cleanContent.replace(
        /rel="stylesheet"/g,
        'rel="preload" as="style"'
      );

      cleanContent = cleanContent.replace(
        /<amp-story-page/,
        `<amp-story-auto-ads>
            <script type="application/json">
              {
                "ad-attributes": {
                "type": "adsense",
                "data-ad-client": "ca-pub-XXXXXXXXX",
                "data-ad-slot": "XXXXXXXXX"
                }
              }
            </script>
          </amp-story-auto-ads>
          <amp-story-page
        `
      );

      const SeoData = data.webStory.seo;

      cleanContent = cleanContent.replace(
        /<link rel="canonical".*?[>]/g,
        `<link rel="canonical" href="${SITE_URL}/web-stories/${slug}">
        <meta name="description" content="${SeoData?.metaDesc}">
        <meta property="og:locale" content='en_US'>
        <meta property="og:type" content='article'>
        <meta property="og:site_name" content='mridul.tech'>
        <meta property="twitter:card" content='summary_large_image'>
        <meta property="twitter:site" content='@i_mridul'>
        <meta property="og:title" content="${SeoData?.title}">
        <meta property="og:description" content="${SeoData?.metaDesc}">
        <meta property="og:image" content="${SeoData?.opengraphImage?.sourceUrl}">
        <meta property="og:image:height" content="1350">
        <meta property="og:image:width" content="1080">
        <meta property="og:url" content="${SITE_URL}/web-stories/${slug}">
        <script async custom-element="amp-story-auto-ads" src="https://cdn.ampproject.org/v0/amp-story-auto-ads-0.1.js"></script>`
      );

      return cleanContent;
    };

    res.setHeader("content-type", "text/html");
    res.setHeader("Cache-Control", "s-maxage=900, stale-while-revalidate=900");
    res.write(cleanStory(data?.webStory.content));
    res.end();
  }

  return {
    props: {},
  };
};

const StoryPage = () => {};

export default StoryPage;
Conclusion
Adding Google Web Stories to your Next JS website can significantly boost user engagement and improve your website’s SEO. With the step-by-step guide provided here, you can easily get started on creating captivating Web Stories that will leave your audience wanting more. Start enhancing your website’s user experience today with Web Stories!
You may also like
Types of APIs: A Complete Guide to API Categories

Aug 23, 2025
·3 Min Read
Have you ever wondered how your favorite apps talk to each other? Think about logging into a game with your Google account or paying through PayPal on an e-commerce site. That’s all possible because of APIs. They’re like digital messengers, making sure systems communicate smoothly. But did you know there are different types of APIs […]
Gemini CLI: Google’s Open Source AI Terminal Agent

Jun 26, 2025
·4 Min Read
Google has once again reshaped the future of developer productivity and AI-assisted coding by launching Gemini CLI, an open-source AI agent that seamlessly integrates the power of Gemini AI directly into your terminal. With 1,000 free requests per day, instant access to automated coding tasks, and the ability to generate images, videos, and website templates, […]
How to send Emails in Next JS for Free using Resend

Nov 10, 2023
·7 Min Read
Sending emails in web applications is a crucial feature, and in this article, we will explore how to send Emails in Next JS for free using Resend. Next JS is a popular framework for building React applications, and Resend is a handy tool for email integration. By the end of this guide, you’ll have the […]
How to add Google Login in Next.js with Appwrite

Nov 01, 2023
·7 Min Read
Are you looking to enhance user authentication in your Next.js application? Integrating Social Login with Appwrite can be a game-changer. Add Google Login to your Next.js app with Appwrite. This article will guide you through the process, and practical tips to add Google Login in Next.js with Appwrite. GitHub Code: Google Login in Next.js with […]
JavaScript Project Ideas to Boost Your Portfolio

Oct 13, 2023
·3 Min Read
JavaScript is the backbone of web development, and mastering it is essential for any aspiring developer. While learning the basics is crucial, building real-world projects is the key to solidifying your knowledge. In this comprehensive guide, we’ll present a diverse range of JavaScript project ideas that cater to different skill levels and interests. These projects […]
How to Generate robots.txt in Next JS?

Oct 05, 2023
·4 Min Read
In the world of web development and search engine optimization (SEO), ensuring that your website is easily accessible and properly indexed by search engines is paramount. One essential tool that aids in this process is the creation of a robots.txt file. In this comprehensive guide, we, the experts, will walk you through the process of […]