How to add Google Login in Next.js with Appwrite

Mridul Panda
Nov 01, 2023
·7 Min Read
Are you looking to enhance user authentication in your Next.js application? Integrating Social Login with Appwrite can be a game-changer. Add Google Login to your Next.js app with Appwrite. This article will guide you through the process, and practical tips to add Google Login in Next.js with Appwrite.
GitHub Code: Google Login in Next.js with Appwrite
What is Appwrite?
Appwrite is an open-source backend server that helps you build modern applications faster. It provides a set of SDKs for different programming languages and frameworks, including Next.js. You can use Appwrite to add authentication, databases, storage, and more to your Next.js app. In this article, we will focus on the authentication part. We will use Appwrite’s Social Login feature to enable users to sign in to our Next.js app using their social media accounts.
Set Up Your Next.js Project
Let’s start by setting up our Next.js project. Create a new Next.js app using the following command:
npx create-next-app social-login-app

cd social-login-app
We will use the Next.js App directory structure for this tutorial. You can learn more about the Next.js App directory structure from here. We will also use Tailwind CSS in this project. You can follow these steps in your app creation.
✔ Would you like to use TypeScript? … No / Yes : No
✔ Would you like to use Tailwind CSS? … No / Yes : Yes
✔ Would you like to use `src/` directory? … No / Yes : Yes
✔ Would you like to use App Router? (recommended) … No / Yes: Yes
✔ Would you like to customize the default import alias? … No / Yes : No
Next, you need to install the Appwrite JavaScript SDK. You can install the Appwrite JavaScript SDK using the following command:
npm install appwriteFor the social icons, we will use react-icons so let’s install the package –
npm install react-icons --saveSetup Appwrite Project
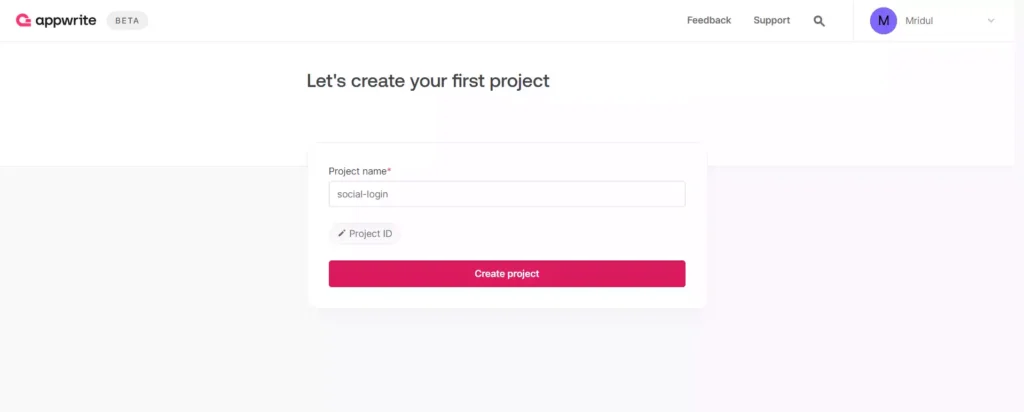
Head to the Appwrite Console. If this is your first time using Appwrite, create an account or log in to your existing account. Create a new project named social-login
Then, under Add a platform, add a Web app. The Hostname should be localhost. You can skip optional steps.

Initialize Appwrite SDK
To use Appwrite in our Next.js app, we’ll need to find our project ID. Find your project’s ID in the Settings page.
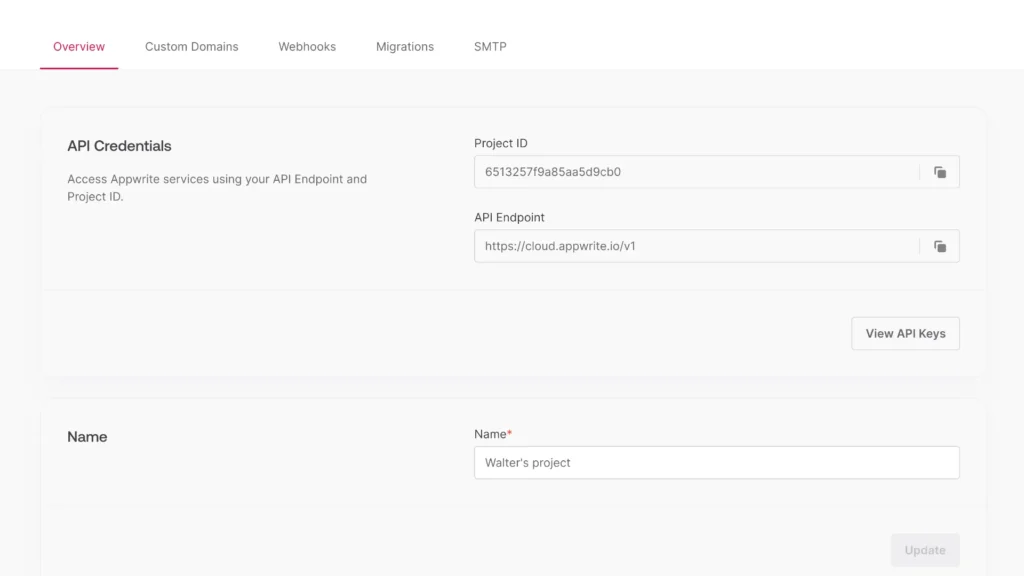
First, create a file that will hold env variables. Create a new file .env.local in the root of your project. Replace <YOUR_PROJECT_ID> with your project ID
NEXT_PUBLIC_APPWRITE_ENDPOINT = https://cloud.appwrite.io/v1
NEXT_PUBLIC_APPWRITE_PROJECT = <YOUR_PROJECT_ID>
Create a new file src/config/appwrite.js to hold our Appwrite code. Only one instance of the Client() class should be created per app. Add the following code to it.
import { Client, Databases, Account } from "appwrite";

export const config = {
  APPWRITE_ENDPOINT: ({}).NEXT_PUBLIC_APPWRITE_ENDPOINT,
  APPWRITE_PROJECT: ({}).NEXT_PUBLIC_APPWRITE_PROJECT,
};

const client = new Client();
client
  .setEndpoint(config.APPWRITE_ENDPOINT)
  .setProject(config.APPWRITE_PROJECT);

export const account = new Account(client);
export const database = new Databases(client);
Configuring Google Login
Let’s configure the Google OAuth login step-by-step
Create a New Google Console Project
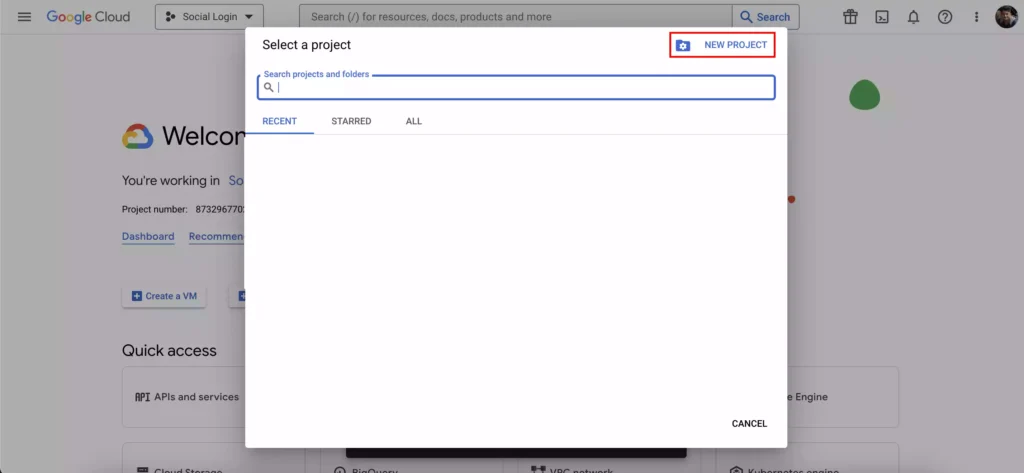
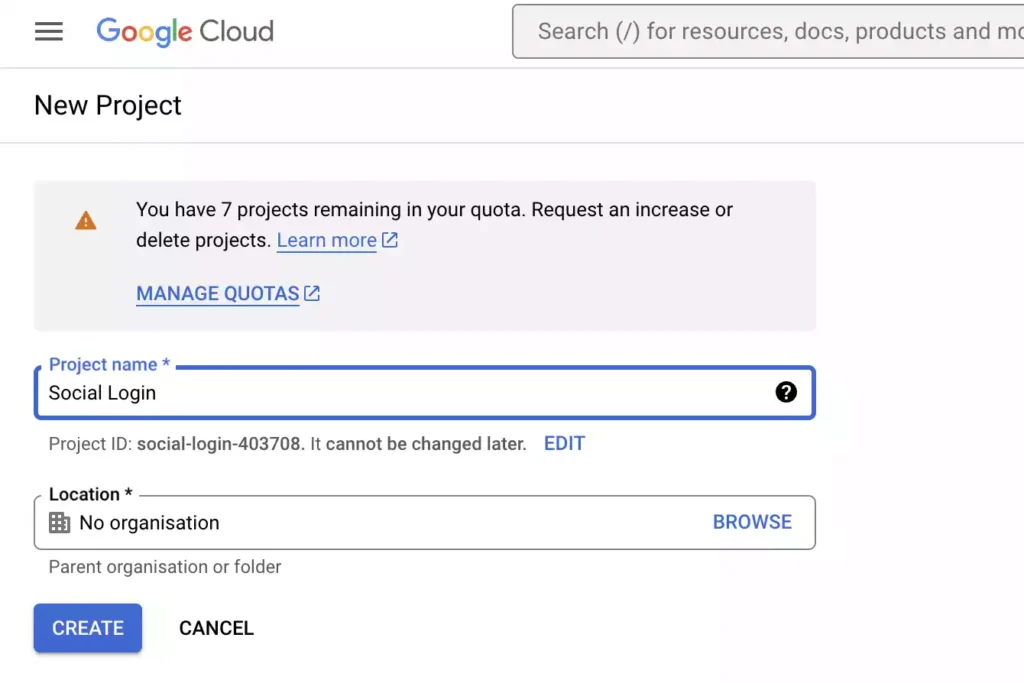
First, go to Google Console. If you aren’t logged in, log in with your Google account. If this is your first time in Google Console, click on Select a project drop-down and click on New Project
Give your project a name like Social Login. You can skip the location select and click on Create.
Also Read: Node JS Project Ideas to Boost Your Portfolio
Create Google OAuth client ID
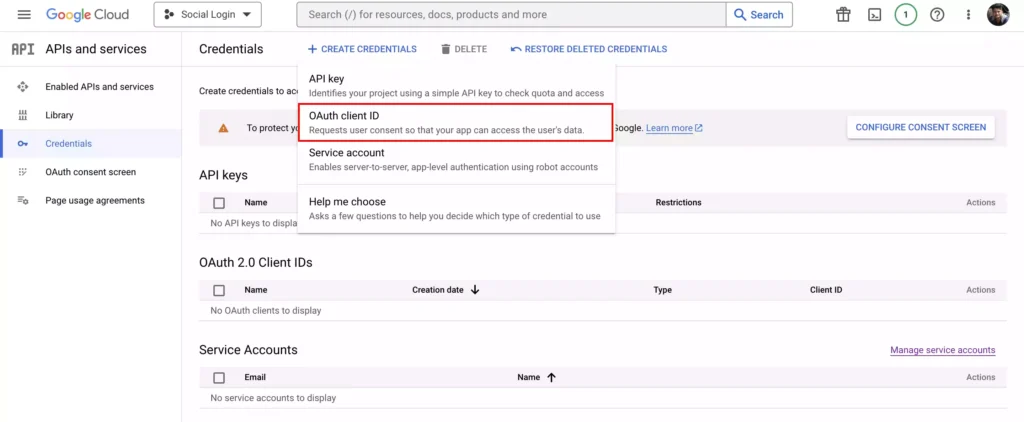
In the credentials tab click on Create Credentials. Now select OAuth Client ID
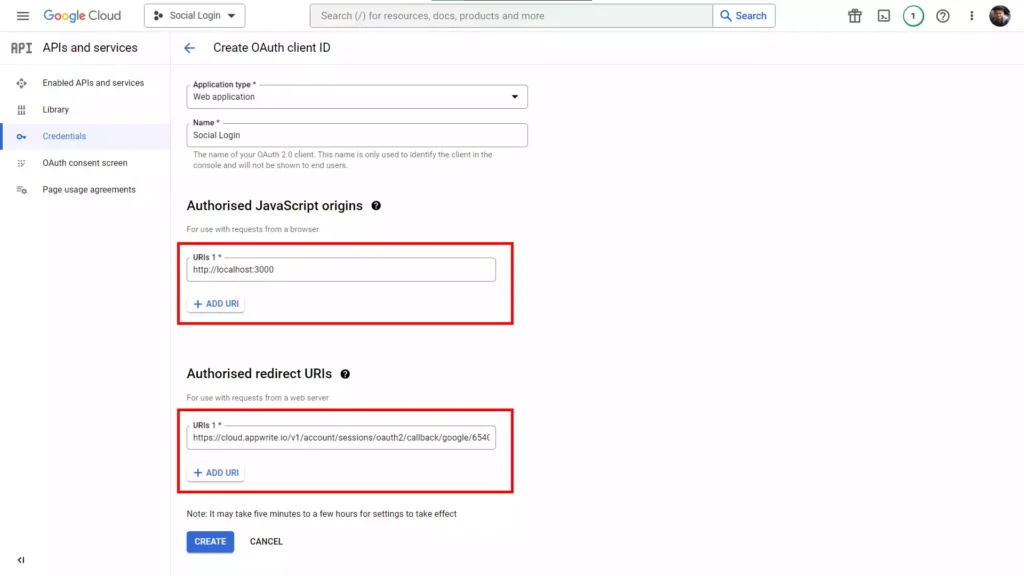
Select Web Application from the dropdown as we are creating this for the web.

Now give your project a name like Social Login. Now add Authorised JavaScript origins. As we are on local development you can add http://localhost:3000 for now. We also have to add Authorised redirect URIs. You have to add the following URL https://cloud.appwrite.io/v1/account/sessions/oauth2/callback/google/<YOUR_APPWRITE_PROJECT_ID> . Replace your YOUR_APPWRITE_PROJECT_ID with your project ID. And click on create.
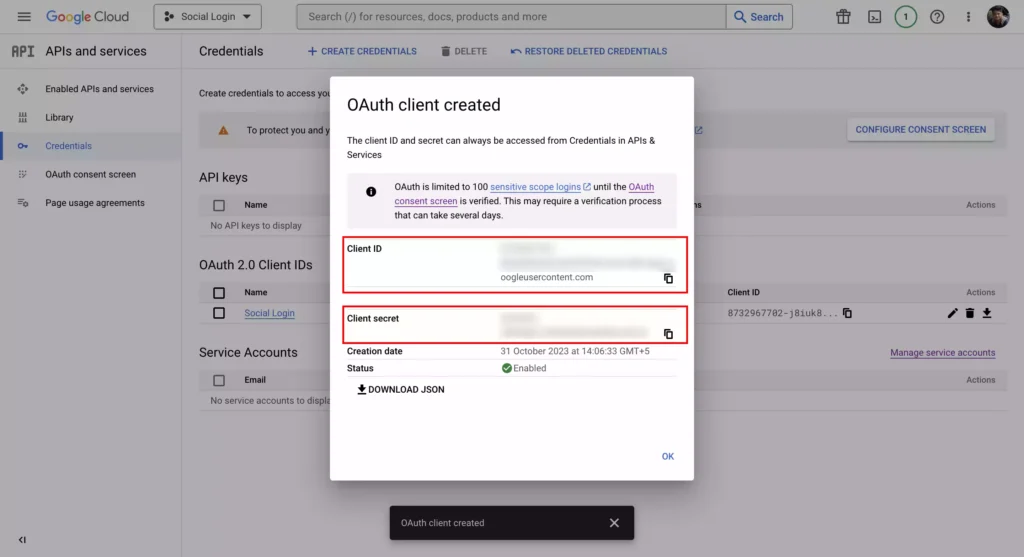
Now you’ll be able to see the Client ID and Client Secret. Copy these two and save it somewhere. We will need this in the next step. Our configuration for Google Cloud Console is done.
Also Read: JavaScript Project Ideas to Boost Your Portfolio
Google Login in with Appwrite
Inside your Appwrite dashboard, go to the “Auth” tab, and under “Settings,” you can configure various social platforms like Google, Apple, or GitHub. This step allows you to set up the desired social login options for your application. We will add the Google login configuration here.
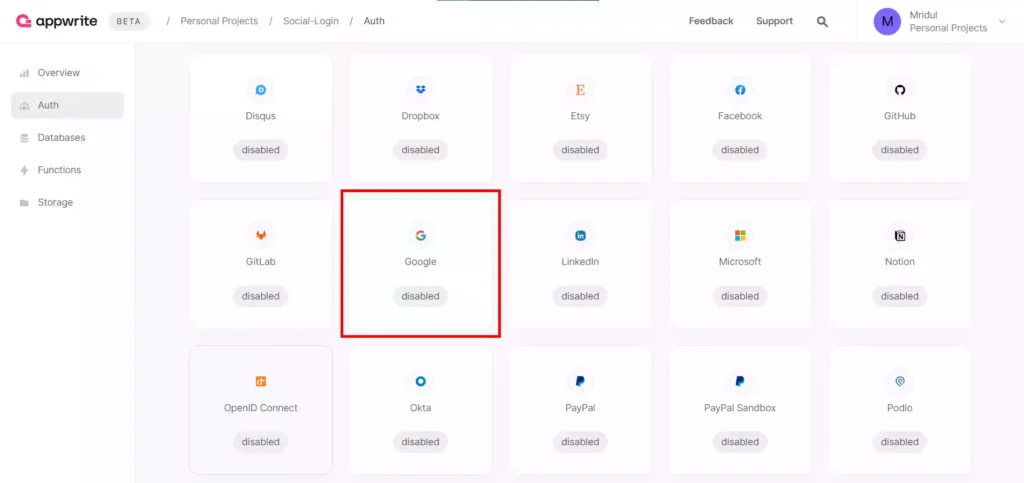
Enable Google OAuth in Appwrite
Click on the Google OAuth card and you will have to add the credentials you got in the previous step. The Client ID is the App ID and the Client Secret is the App Secret. Add these 2, check the enable switch and update. That’s it Our Appwrite setup is also done for the Google OAuth.
Google Login in Next.js with Appwrite
Finally, we will create the Google Login functionality in our app. First, we will create a Google Login button on our home page. Go to app/page.js and create a button
"use client";

import React from "react";
import { FcGoogle } from "react-icons/fc";

const HomePage = () => {
  return (
    <div className="flex justify-center items-center min-h-screen flex-col">
      <h1 className="text-2xl font-bold">Social Login</h1>
      <div className="mt-5">
        <button className="flex justify-center items-center gap-2 border-2 border-slate-600 px-5 py-2 rounded-sm">
          <FcGoogle size={30} />
          <span>Login with Google</span>
        </button>
      </div>
    </div>
  );
};

export default HomePage;
On the clicking of the button, we will add the login function. We will be using the account that we exported from the appwrite.js config file.
"use client";

import React from "react";
import { FcGoogle } from "react-icons/fc";

import { account } from "@/config/appwrite";

const HomePage = () => {
  return (
    <div className="flex justify-center items-center min-h-screen flex-col">
      <h1 className="text-2xl font-bold">Social Login</h1>
      <div className="mt-5">
        <button
          className="flex justify-center items-center gap-2 border-2 border-slate-600 px-5 py-2 rounded-sm"
          onClick={() => {
            account.createOAuth2Session(
              "google",
              "http://localhost:3000/dashboard", // Success URL
              "http://localhost:3000" // Failure URL
            );
          }}
        >
          <FcGoogle size={30} />
          <span>Login with Google</span>
        </button>
      </div>
    </div>
  );
};

export default HomePage;
We are using createOAuth2Session method to create a new OAuth2 session with the provider. The method accepts three parameters: provider, success and failure URLs. The provider parameter is the name of the provider you want to use. The success and failure URLs are the URLs the user will be redirected to after the login process is completed.
Now the user will be redirected to the Google login page. After the user logs in, they will be redirected to the success URL.
We can get the user details from the Appwrite SDK using the account.get() method. We can then display the user details on the page. Go to app/dashboard/page.js and this will serve as /dashboard route.
"use client";

import React, { useEffect, useState } from "react";
import { account } from "@/config/appwrite";

const Dashboard = () => {
  const [user, setUser] = useState();
  const getAccount = async () => {
    const accountData = await account.get();
    setUser(accountData);
  };

  useEffect(() => {
    getAccount();
  }, []);

  return (
    <div className="flex flex-col justify-center items-center p-5">
      <h1 className="text-3xl">Dashboard</h1>
      {user && (
        <div className="mt-3">
          <p>Username: {user.name}</p>
          <p>Email: {user.email}</p>
        </div>
      )}
    </div>
  );
};

export default Dashboard;
Tip: You can also get the details of the current session with await account.getSession('current')
Also Read: Next JS Project Ideas to Boost Your Portfolio
Conclusion
In this article, we’ve walked you through the process of adding Google Login to your Next.js application using Appwrite. With this feature, you can provide your users with a convenient and secure sign-in method. Remember to keep your user experience at the forefront and explore further customization to match your app’s unique style.
Enhance your application’s user authentication today by implementing Google Login with Appwrite and Next.js.
You may also like
Types of APIs: A Complete Guide to API Categories

Aug 23, 2025
·3 Min Read
Have you ever wondered how your favorite apps talk to each other? Think about logging into a game with your Google account or paying through PayPal on an e-commerce site. That’s all possible because of APIs. They’re like digital messengers, making sure systems communicate smoothly. But did you know there are different types of APIs […]
Gemini CLI: Google’s Open Source AI Terminal Agent

Jun 26, 2025
·4 Min Read
Google has once again reshaped the future of developer productivity and AI-assisted coding by launching Gemini CLI, an open-source AI agent that seamlessly integrates the power of Gemini AI directly into your terminal. With 1,000 free requests per day, instant access to automated coding tasks, and the ability to generate images, videos, and website templates, […]
How to add Google Web Stories in Next JS

Dec 14, 2023
·10 Min Read
In the fast-paced digital world, user engagement is key to the success of any website. One effective way to captivate your audience is by incorporating Google Web Stories into your Next JS website. These visually appealing and interactive stories can make your content more engaging and shareable. In this comprehensive guide, we’ll walk you through […]
How to send Emails in Next JS for Free using Resend

Nov 10, 2023
·7 Min Read
Sending emails in web applications is a crucial feature, and in this article, we will explore how to send Emails in Next JS for free using Resend. Next JS is a popular framework for building React applications, and Resend is a handy tool for email integration. By the end of this guide, you’ll have the […]
JavaScript Project Ideas to Boost Your Portfolio

Oct 13, 2023
·3 Min Read
JavaScript is the backbone of web development, and mastering it is essential for any aspiring developer. While learning the basics is crucial, building real-world projects is the key to solidifying your knowledge. In this comprehensive guide, we’ll present a diverse range of JavaScript project ideas that cater to different skill levels and interests. These projects […]
How to Generate robots.txt in Next JS?

Oct 05, 2023
·4 Min Read
In the world of web development and search engine optimization (SEO), ensuring that your website is easily accessible and properly indexed by search engines is paramount. One essential tool that aids in this process is the creation of a robots.txt file. In this comprehensive guide, we, the experts, will walk you through the process of […]