How to Add Google Analytics in NextJS

Mridul Panda
Feb 18, 2023
·3 Min Read

The most valuable commodity in the world right now is data. Therefore, if you want to grow your business, you must understand how your people are utilising your platform. And in the world of analytics, Google Analytics is the most used tool and it’s completely free to use. In this article, we are going to Add Google Analytics in NextJS project.
Google Analytics Set up for the project
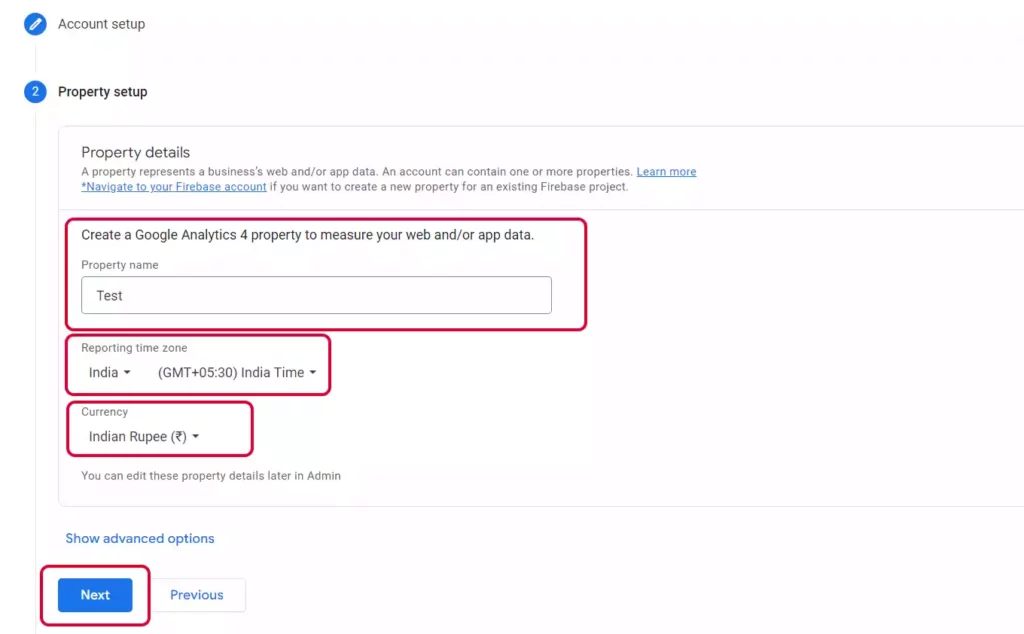
1. Go to analytics.google.com and register a new account. The first time you register, you will be prompted to add a new property. Give your property a name. Then select your country and time zone. Select your currency from the dropdown as well. Now Click on the next button.
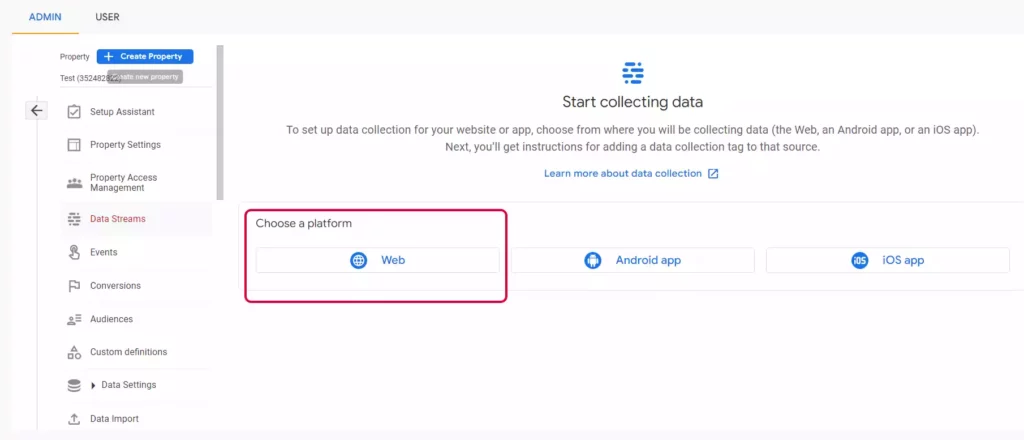
2. The admin portion of your account allows you to add a new property if you already have a Google Analytics account. You can add details about your business but this is optional so you can skip that.
3. The next step is to create a data stream. We will choose the web as we are implementing this on the web.
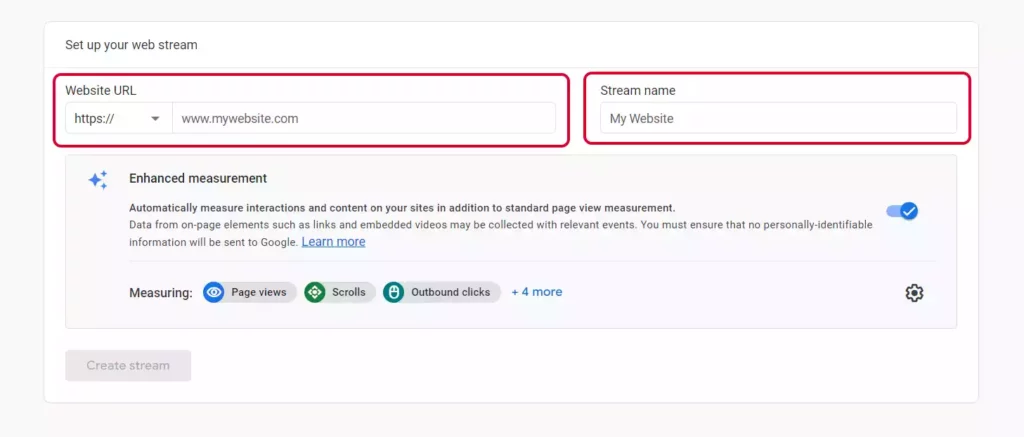
4. Provide the URL of your website and the name of your website and click on create stream button.
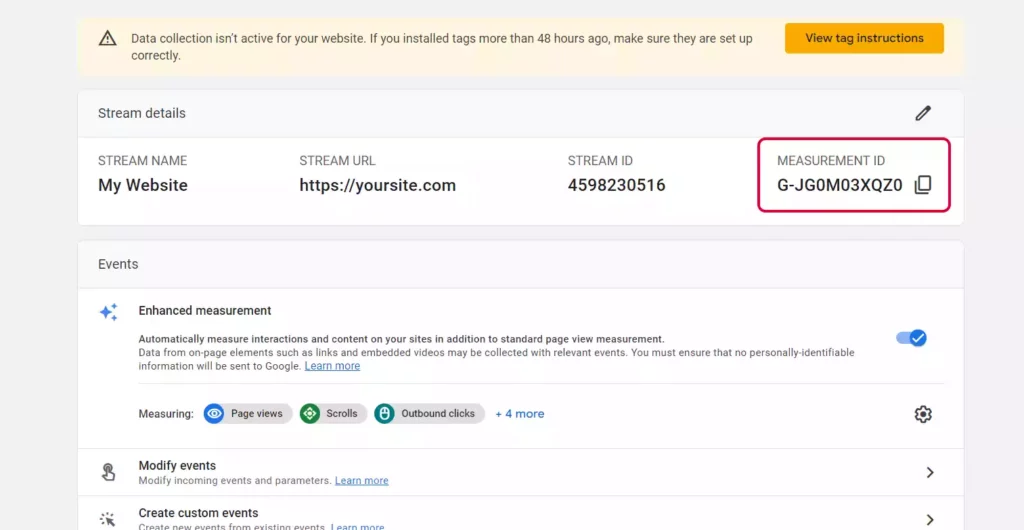
5. The Measurement ID, which is the most crucial component of the entire procedure, must now be obtained. Copy that ID, we will need that later. It will be like the following in some ways G-XXXXXXXXXX.
Now we will add setup Google Analytics to our Next JS project
Also Read: Next JS Project Ideas to Boost Your Portfolio
Next JS Google Analytics
1. Let’s create a Next JS project first. We will name the project google-analytics-next-js
npx create-next-app google-analytics-next-js
or
yarn create-next-app google-analytics-next-js
cd google-analytics-next-js2. Make a file called .env.local in the project root. Then insert the code there. Although you could do this directly in the code, environment variables are preferable.
NEXT_PUBLIC_GA_ID = G-xxxxxxxx
3. Now we will initialize the Google Analytics in the _app.js File. We will use the Next JS Script component instead of the HTML script.
// _app.js
import React from 'react';
import Script from 'next/script';

function MyApp({ Component, pageProps }) {
  const NEXT_PUBLIC_GA_ID = process.env.NEXT_PUBLIC_GA_ID;

  return (
    <>
      {/* Global Site Tag (gtag.js) - Google Analytics */}
      <Script
        strategy="afterInteractive"
        defer
        src={`https://www.googletagmanager.com/gtag/js?id=${NEXT_PUBLIC_GA_ID}`}
      />
      <Script
        id="gtag-init"
        strategy="afterInteractive"
        dangerouslySetInnerHTML={{
          __html: `
            window.dataLayer = window.dataLayer || [];
            function gtag(){dataLayer.push(arguments);}
            gtag('js', new Date());
            gtag('config', '${NEXT_PUBLIC_GA_ID}', {
            page_path: window.location.pathname,
            });
          `,
        }}
      />

      <Component {...pageProps} />
    </>
  );
}

export default MyApp;
In the Script component, we have used strategy="afterInteractive". This will optimize our website performance.
Test Google Analytics in NextJS
4. Now run the app with npm run dev command. Now let’s test if our analytics code is working. So open the URL http://localhost:3000 and open the console. Run dataLayer command in your console.
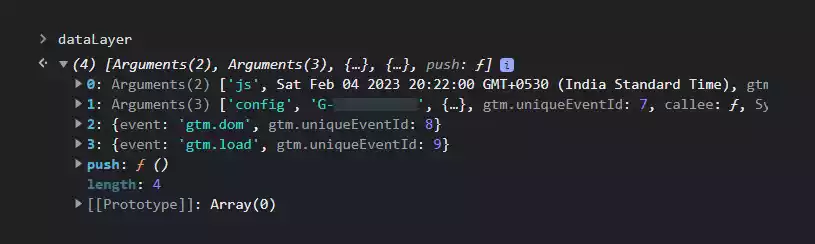
5. undefined indicates that there was a problem. Congratulations if you see something similar to the image above! Your analytics have been enabled.
Also Read: How to add Google AdSense in Next JS
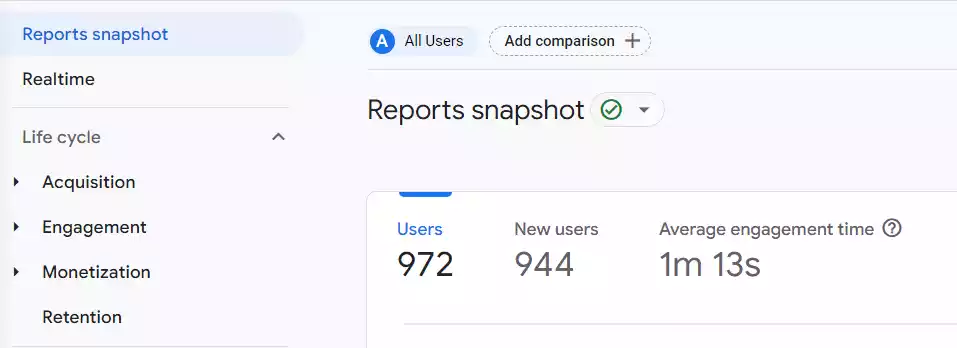
Check the Google Analytics Dashboard
Go to the dashboard and select the realtime option to view the application’s information in real-time.
You may also like
Next JS vs React: Which One Should You Choose?

Aug 30, 2025
·4 Min Read
When it comes to building web applications, React is one of the most popular frameworks out there. But with the emergence of Next JS, many developers are left wondering which one they should choose. In this article, we’ll see Next JS vs React to help you decide which one is best for your project. Next.js […]
How to add Styled components in Next.js App router

May 11, 2024
·4 Min Read
Styled components have become a popular choice for styling React applications due to their simplicity and flexibility. When it comes to integrating styled components into a Next.js application, it’s essential to understand how to leverage them effectively within the app router. In this guide, we’ll explore step-by-step how to add styled components to a Next.js […]
How to add Google Web Stories in Next JS

Dec 14, 2023
·10 Min Read
In the fast-paced digital world, user engagement is key to the success of any website. One effective way to captivate your audience is by incorporating Google Web Stories into your Next JS website. These visually appealing and interactive stories can make your content more engaging and shareable. In this comprehensive guide, we’ll walk you through […]
How to send Emails in Next JS for Free using Resend

Nov 10, 2023
·7 Min Read
Sending emails in web applications is a crucial feature, and in this article, we will explore how to send Emails in Next JS for free using Resend. Next JS is a popular framework for building React applications, and Resend is a handy tool for email integration. By the end of this guide, you’ll have the […]
How to add Google Login in Next.js with Appwrite

Nov 01, 2023
·7 Min Read
Are you looking to enhance user authentication in your Next.js application? Integrating Social Login with Appwrite can be a game-changer. Add Google Login to your Next.js app with Appwrite. This article will guide you through the process, and practical tips to add Google Login in Next.js with Appwrite. GitHub Code: Google Login in Next.js with […]
How to add Protected Routes in Next JS

Oct 28, 2023
·5 Min Read
In the world of web development, security is paramount. Whether you are building a simple blog or a complex web application, protecting certain routes and pages from unauthorized access is a crucial step. In this comprehensive guide, we will walk you through the process of adding protected routes in Next JS, ensuring that your web […]